How To Maintain And Repair Flower Pots?
A flower pot is not just a straightforward container. It is essential to flower growth and a major component of interior design. In addition to giving flowers a cosy place to thrive, where their roots can spread out and breathe easily, a well-kept flower container may also bring some vibrant colour into the house with its tidy and lovely appearance, adding to the overall design of the room.
Daily cleaning
Timing and frequency of cleaning
In general, dust, water stains, and other debris are likely to show up on the surface of a newly purchased flower pot after it has been used for a while. Now is an excellent time to clean it. Flower pots that have been left outside for an extended period of time must be cleaned more frequently because they are subject to wind, sun, and rain. To keep the flower pots clean and fresh at all times, it is advised to wipe them every one or two weeks. Remember to clean the flower containers as soon as possible after treating sick or insect-infested flowers to prevent bacteria buildup and additional flower damage.
Method of cleaning
Flower pots made of ceramic: Although ceramic flower pots are beautiful and have a delicate feel, they are also somewhat delicate. When cleaning every day, start by gently wiping off surface dust with a soft, moist cloth. Apply a small amount of laundry detergent or liquid to any stains, then use a moist cloth to wipe them off several times. To keep the flower pot from getting scratched and losing its shine, use a rag that isn't too abrasive. To restore the flower pot's smoothness, you could as well try using a small amount of toothpaste, waiting a little time, and then wiping it with a moist cloth if you come across tough stains that are hard to get rid of; The remaining tea bags can also be dried, dipped in cooking oil, and the dirt gently wiped off. Use detergent to remove oil stains once the dirt has been dissolved. To keep the flower pot from fading, you must use extremely caustic detergents, such 84 disinfection, if it is a coloured ceramic flower pot.
When cleaning plastic flower pots, soak the pot in hot water to dissolve the stains, then smash the egg shells and give them a good wipe down with a damp cloth dipped in the egg shell crumbs. For minor stains and oil stains, it works well. After that, wash it again with detergent. If it bothers you, you can also try wiping it with a tea bag that has been soaked in cooking oil. This will protect the flower pot's surface and get rid of stains. Simply add detergent and rinse it clean after wiping. Additionally, erasers and toothpaste can be useful.
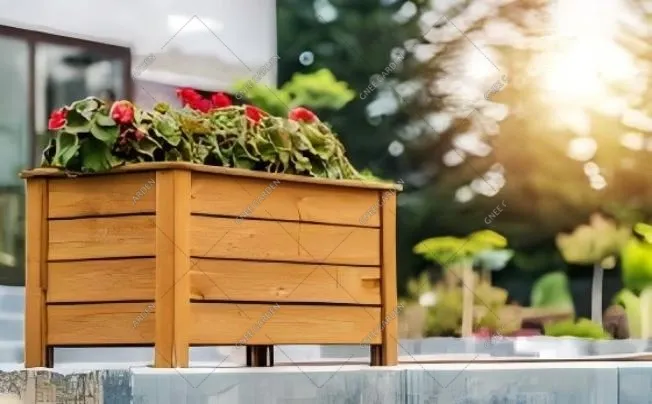
Wooden flower pots: Mould and moisture may quickly deteriorate wood products. To remove stains, gently wipe with a moist cloth dipped in mild soapy water after using a dry cloth to remove dust. To prevent the wood from drying out, avoid direct sunlight after cleaning and instead let it air dry in a well-ventilated area. You can also frequently add a layer of wood wax oil, which is both waterproof and attractive, to wooden flower pots to prolong their lifespan and keep mould from growing.

Flower Pot Repair
1. Crack repair technique
Flower pots will unavoidably get some bumps and cracks from regular use. Don't discard it right away. Cracks can be fixed as long as they are not very severe.
Epoxy resin glue is a "saviour" for cracks in ceramic flower pots. To make sure there is no dust or oil present, start by cleaning the flower pot's gaps and the surrounding areas. Next, precisely mix the epoxy resin glue using the ratio specified in the directions. Stirring swiftly and evenly, carefully fill the crack with glue using a toothpick or plastic scraper, trying to fill it fuller, and then softly scraping the surface until it is flat with the flower pot's outside wall.
A handmade cement egg white paste can be used to fix cracks in clay flower pots. A thick paste is created by cracking an egg, separating the white, adding the proper amount of cement, and mixing. The crack will be securely "sewn" if you gently apply this paste to it, wait for it to solidify, and then wait some more.
2. A splicing procedure that is damaged
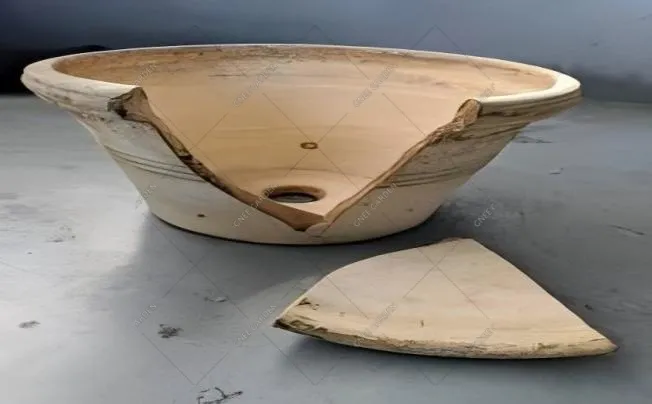
Don't give up if the flower pot is shattered or has huge pieces of damage; we can attempt to fix it by splicing. First, gather all of the pieces—don't forget any—then rinse them with fresh water and lay them somewhere with airflow to dry. Splice the pieces one at a time in accordance with the flower pot's original shape after preparing a strong glue, such as 502 glue, AB glue, etc., and applying it evenly to the shattered surface. To make sure the pieces fit tightly during splicing, you can gently secure them using ropes or clips.
Remove the fixings once the glue has dried and solidified entirely. This will let the broken flower pot to stand securely once more while continuing to shield the flowers from the elements. However, give the restored flower pot some time to "recuperate" and regain its previous strength, and attempt to avoid accidents in the early stages.

Exclusive care for flower pots made of special materials
Flower pots made of wood
Due to their inherent fragility, wood products are more susceptible to the negative effects of humid surroundings, which can lead to issues including mould growth, degradation, and wetness. They might also suffer from an infestation of insects and turn into a "food paradise" for ants and other insects.
When performing daily maintenance, you should frequently move the flower pots to a sunny, well-ventilated area to dry them, allowing the moisture in the wood to dissipate and keep the pots dry. You may also want to apply a layer of moisture-proof paint to the flower pots before using them, as this can effectively block the invasion of water vapour.
If you notice that the flower pot's surface has a little mould on it, you can wipe it gently with a soft cloth dipped in a suitable amount of white vinegar. This will not only get rid of the mould, but it will also sterilise and disinfect the area. To address the issue of insect infestation, you can surround the flower pots with insect repellents like pepper bags, mothballs, etc., and use the strong scent they release to ward off pests. You can also frequently mist the flower pots' surface with diluted insecticide solution, but take care to keep the agent away from the flowers' roots to protect them.
Flower pots made of wrought iron
Rust is the greatest "enemy" of wrought iron materials. Once rusted, it will not only detract from the flower pots' aesthetic appeal but also progressively weaken their structural integrity and diminish their lifespan.
In order to produce a strong anti-rust "shield" for the flower pots, it is best to perform anti-rust treatment and apply a coat of anti-rust paint before using the wrought iron flower pots for the first time. This will guarantee that every corner is evenly covered. Simply use a moist towel to gently wash it down during regular cleaning to get rid of dust and debris without causing any harm to the paint surface; You can use a small amount of detergent solution to remove tough stains, but make sure to wipe it dry quickly thereafter to avoid rust. To keep wrought iron flower pots from being saturated in water for an extended period of time, place them away from locations where water has accumulated. Keep rainwater from building up inside the flower pots at the same time. If the flower pot's bottom does not have a drainage hole, you can drill one yourself to guarantee easy drainage and keep the wrought iron flower pots dry and free from rust.

Selected Blogs
-
What customization services are available for metalworking customization?
2024-12-12
-
What Is The Difference Between A Plant Container And A Raised Bed?
2024-04-23
-
Garden Screening & Fence Panels
2024-04-23
-
Gardening pot selection tips
2024-04-17
-
The function and collocation of horticultural fire pot
2024-04-17


